Another successful Stampaway USA is in the books. Gaye and I traveled to Cincinnati Ohio for the annual convention (this one being number 24). Gaye had two fun classes which kept us busy on Thursday and Friday. The highlight of the Friday Night Preview Party (besides the shopping and seeing old friends) is the theme for the night. This year had a tiara theme. It is optional, of course, to wear a tiara or crown while shopping, but I love how the vendors participate and how many attendees go all out to compete for the best one. Here are a few I captured and the various ways the theme was interpreted.
I always love watching demos, and Mary Beth Shaw of Stencil Girl and Dyan Reaveley of Dylusions (Dyan pictured below) are two of my favorites.
Lots of shopping, lots of walking, lots of catching up with friends, and before you know it, it was time to head home on Saturday. That is where the story took a detour, literally. It's 15 miles from the convention center to the Kentucky state line. It took us three hours. Interstate traffic was moving, but barely. We never really knew if it was just a lot of traffic, all the construction, or a wreck... probably all three. After barely moving during all that time, we decided to leave the interstate waiting to cross the bridge over the river, and went to find the smaller bridge that we knew led to Covington, Ky. From there, we knew how to get back on the interstate south of where the bottleneck was in Ohio. Apparently, most of the other people had the same idea. That route was just as crowded, but at least it was moving, and at least we finally saw the sign that we had made it to Kentucky! Halleluiah!
I did get a few stamps, and a bunch of new washi tape.
And I may have gotten a stencil or two.. or maybe over a dozen... I needed to play when I got home, and this page was done with just black and red ink pads stenciled onto a page that already had gold paint on it.
I think this may be my new favorite stencil. I didn't even know such a thing existed until I saw it hanging in a booth. I love it. I can quickly stencil the day and date without having to mask out the letters and numbers, because the little wheel thing turns to where I want it and does the masking for me!
Stampaway USA 2017 - year 25 - only one year away!
Monday, August 8, 2016
Monday, August 1, 2016
House of Thoughts
Last week, I went to friend Gaye's house to make a book. The "House of Thoughts" book is one she will be teaching at Stampaway this week. The one on the left is one she gave me for Christmas last year, and the one on the right is the one I made last week.
I've had fun adding things to the pages of my book since I got home. Pockets, tags, quotes, stamping. The possibilities are endless!
The two books we made are variations on the one that will be taught in class, where they will make one with a more traditional, classic style roof. Ours had an asymmetrical roof with funky chimney!
More information about classes and the convention can be found here at Stampaway.
I've had fun adding things to the pages of my book since I got home. Pockets, tags, quotes, stamping. The possibilities are endless!
The two books we made are variations on the one that will be taught in class, where they will make one with a more traditional, classic style roof. Ours had an asymmetrical roof with funky chimney!
More information about classes and the convention can be found here at Stampaway.
Saturday, July 30, 2016
DLP Planner Weeks 29 and 30
On week 28, I had used a tan/beige tag. The back of that tag is dark blue, so this is what I did for week 29, the week starting July 10. I printed a collage sheet from Artstronauts onto sticker paper, and cut out a nice long border section to put down the side of the tag. Then I used a white gel pen and stencil to mark the days of the week. And that was that!
For the week starting July 17, week 30, I cut a section of watercolor paper from where I had played with some Koi brush markers and water a couple of weeks ago.
I took some white mailing labels and stenciled feather designs on the sides. The labels were wider than what I needed, so I cut each one in half, then stamped the dates on them. I placed them on the page, each one with the rounded edges of the label at the top and the cut part at the bottom (not that it's even noticeable!)
I finished off that page with some washi tape on the left side where the holes were punched.
I might actually have all of the July weeks done before August gets here!
For the week starting July 17, week 30, I cut a section of watercolor paper from where I had played with some Koi brush markers and water a couple of weeks ago.
I took some white mailing labels and stenciled feather designs on the sides. The labels were wider than what I needed, so I cut each one in half, then stamped the dates on them. I placed them on the page, each one with the rounded edges of the label at the top and the cut part at the bottom (not that it's even noticeable!)
I finished off that page with some washi tape on the left side where the holes were punched.
It still looked a little plain, and I ended up making scribble marks around the labels with a black pen.
Tuesday, July 26, 2016
Journal Play
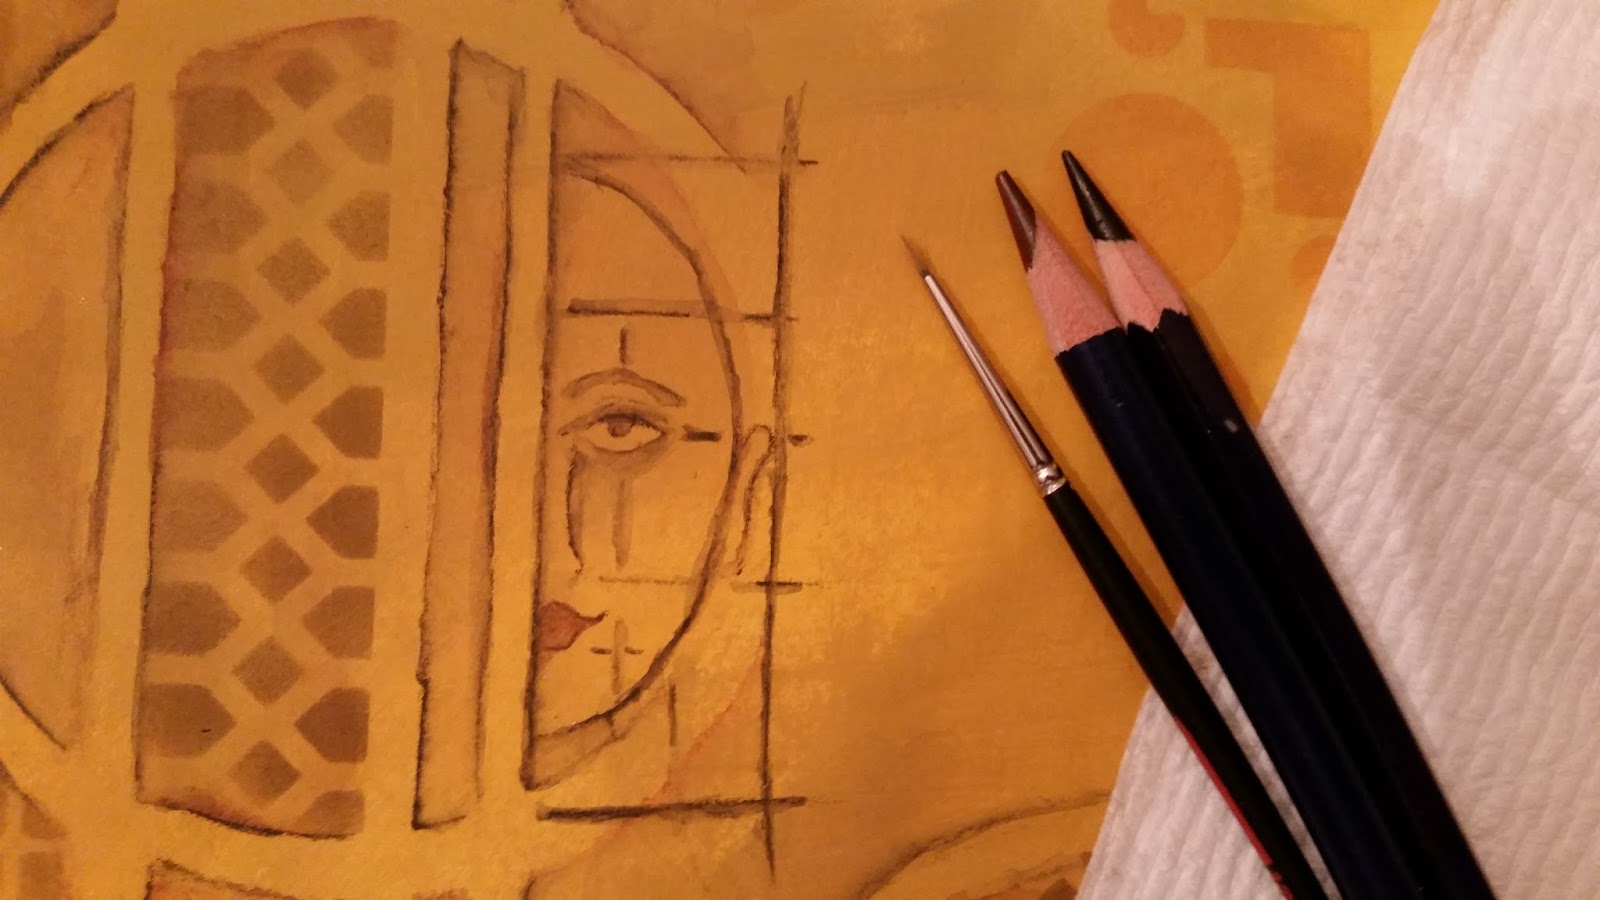
Another journal page in progress, in a journal where I paint the pages with leftover paint from other projects. I needed some play time, and didn't want to do a whole page, just doodle. I started with a big stencil and some watercolor pencils.
I traced around the stencil with two colors (black and brown). Just a messy trace, not really pretty.
Used a brush to paint the pencil lines with water. It really gave it a dimensional look.
A couple of days later, I used different stencils to put pattern in a few of the openings.
Today I used a face stencil and added half a face.
I like having this to doodle on just to take a break from other things. Who knows how it will end up!
I traced around the stencil with two colors (black and brown). Just a messy trace, not really pretty.
Used a brush to paint the pencil lines with water. It really gave it a dimensional look.
A couple of days later, I used different stencils to put pattern in a few of the openings.
Today I used a face stencil and added half a face.
I like having this to doodle on just to take a break from other things. Who knows how it will end up!
Wednesday, July 20, 2016
Two Things
First, I wanted to share this cool little ATC caddy that my friend Gaye Medbury is teaching at Stampaway in Cincinnati this year. I was in her studio earlier this year and made this one using her artsy collage sheet.
The caddy can hold ATCs or tags, photos, business cards, whatever fits! As always, she has so many creative samples to inspire the students.
The class is on Friday, August 5-- sign up here at Stampaway.
Secondly, I am still one of the few people on earth not on Facebook. But I did recently enter the world of Instagram. I'm still trying to figure out what I'm doing, and today I added a video of the ATC caddy. Instagram chopped off the top and bottom of the video but you get the idea. I do know the pictures there are square, so it's a learning experience on my part! My account is here.
The caddy can hold ATCs or tags, photos, business cards, whatever fits! As always, she has so many creative samples to inspire the students.
The class is on Friday, August 5-- sign up here at Stampaway.
Secondly, I am still one of the few people on earth not on Facebook. But I did recently enter the world of Instagram. I'm still trying to figure out what I'm doing, and today I added a video of the ATC caddy. Instagram chopped off the top and bottom of the video but you get the idea. I do know the pictures there are square, so it's a learning experience on my part! My account is here.
Saturday, July 16, 2016
DLP Weeks 27 and 28
July has been pretty busy. You would think I would keep track of things in my DLP planner. Except I just got around to making the weekly pages. I think starting July in a new binder threw me off. I don't have any inspiration from the preceding week to jump start me!
For week 27, the week ending July 2, the first thing I had to do was cover the whole page, which happens to be the back side of the monthly calendar page from the previous post. Although that calendar page is a gold color, the back is white. I debated many options, painting, stenciling, etc... but decided to just print a weekly page onto a patterned paper. This one with writing is a free insert from Somerset Studio magazine. The paper was not quite long enough to cover the whole page, so I put washi tape around the edges. I stamped the dates and days, and that one is done. Not a whole lot left to say about that technique!
For Week 28, week ending July 9, I decided to use a tag from my stash. I have these tags with a fold at the top, but I decided to cut off the flap and not add bulk to the planner.
I picked a light color as it looked best next to the preceding page. I had some of the same background paper left over and cut it to size to fit the tag. I used washi tape to divide the days, and stamped the dates and days.
I wrote July at the top, and that one is now complete as well. Not very creative, but it's okay.
After I made it, I discovered the light colored tag has dark blue on the back, so that will be my challenge the next week.
For week 27, the week ending July 2, the first thing I had to do was cover the whole page, which happens to be the back side of the monthly calendar page from the previous post. Although that calendar page is a gold color, the back is white. I debated many options, painting, stenciling, etc... but decided to just print a weekly page onto a patterned paper. This one with writing is a free insert from Somerset Studio magazine. The paper was not quite long enough to cover the whole page, so I put washi tape around the edges. I stamped the dates and days, and that one is done. Not a whole lot left to say about that technique!
For Week 28, week ending July 9, I decided to use a tag from my stash. I have these tags with a fold at the top, but I decided to cut off the flap and not add bulk to the planner.
I picked a light color as it looked best next to the preceding page. I had some of the same background paper left over and cut it to size to fit the tag. I used washi tape to divide the days, and stamped the dates and days.
I wrote July at the top, and that one is now complete as well. Not very creative, but it's okay.
After I made it, I discovered the light colored tag has dark blue on the back, so that will be my challenge the next week.
Friday, July 8, 2016
Random Play
At random times, I'll use up extra paint with a stencil on a journal page, or use a stamp I had out, or just other spurts of playing around, because it's there. I wasn't liking any of this, then one day, it looked okay to me, after adding a little more to it. Just paint, stencils, stamps, art sticker, more paint, cleaning off a round paint applicator, etc. It's still in progress...
I'm sure some day soon, that bird is going to grow some legs while I'm waiting for the coffee to be ready.
Wednesday, July 6, 2016
Working Things Out in July
New month, new month page, even a new binder for the DLP 2016 planner.
Earlier this year, my sister gave me a calendar that I think she said she got for free. She gave it to me because she thought the pages were about the same size as my planner pages. Plus, it's a calendar! There was one quote we both liked, but you have to wait til September to see if I use it.
The calendar theme is mainly about fashion and beauty. I usually check each month to see if the quote for that month is something I want to use. Even if it's not, the calendar section at the bottom might work for me.
For July, you can see it says "Be Patient, it will go on sale". But that wasn't what caught my eye. See the tiny words at the top... "Things have a way of working out." Wow, is all I can say. Seriously. I am going through some challenging work things right now. I've been at my present job less than a year and things have been in a downward spiral over the last month. None of it is anything I can do anything about, other than look for another job. Most of the time, I feel like a 4 year old, wanting to stomp my feet and whine, "I don't want to". See, I feel like I'm whining right now! Anyway, I wanted to use the calendar just for that alone, to look at that sentence every day. The part about things working out, not the part about going on sale. Although things on sale are good too!
I have been saving quotes from Pinterest off and on, and looked through some I had saved. This one seemed to also work for this particular point in my life, so I printed it out. I layered it on cardstock, then decided it needed another layer of black cardstock. I happened to have a small piece of black cardstock that was the right size, but just a little long. Rather than cut that part off, I used three different size hole punches to punch circles. I covered up the original quote, and added a July tab.
It all seemed to work just perfectly, without me having to spend too much time resizing or thinking too hard about it. Like it was meant to be. Because sometimes things have a way of working out. :)
Tuesday, June 28, 2016
Smells like leather
What a fun time I had last Saturday. Traveled to Louisville to attend a bookbinding workshop where we made a leather journal. The class was taught by a very talented book artist who uses upcycled material, Melissa Oesch of ReImagined . These are some of her samples she brought. Each one is unique and beautiful.
This is the book I made (below). My one regret is that I picked flimsy leather for my cover. We had a choice, as Melissa went around the room letting us be the one to pick. So I have no one to blame but myself. I liked the look of this leather, but in retrospect, wish I had used a heavier leather. After I got home, I stiffened the cover a little by attaching a scrap piece I had cut from my original cover. I turned it over to the more suede side, and started sewing it in place, first on the right side of the scrap. I was just about through with that and ready to start sewing the left side of the scrap and thought - eyelets! So I used eyelets on the edge of the flap. I will add a button or bead to the leather tie that wraps around the book.
I did treat myself to one of Melissa's journals, and I'm so glad I did. I picked this one (on the left) because I liked the more tall narrow size. Reminds me of the Midori travel journal a little. That's also how I realized I like the thicker leather. This journal just feel better to hold. It has beautiful deckled paper inside too.
I've been experimenting off and on in the tall journal, testing pens, inks, watercolors, and paints.
This paper holds up surprisingly well. The only bleed through was when I used a lot of water. The Distress ink pad bled completely through the page when I added water.
This is the book I made (below). My one regret is that I picked flimsy leather for my cover. We had a choice, as Melissa went around the room letting us be the one to pick. So I have no one to blame but myself. I liked the look of this leather, but in retrospect, wish I had used a heavier leather. After I got home, I stiffened the cover a little by attaching a scrap piece I had cut from my original cover. I turned it over to the more suede side, and started sewing it in place, first on the right side of the scrap. I was just about through with that and ready to start sewing the left side of the scrap and thought - eyelets! So I used eyelets on the edge of the flap. I will add a button or bead to the leather tie that wraps around the book.
I did treat myself to one of Melissa's journals, and I'm so glad I did. I picked this one (on the left) because I liked the more tall narrow size. Reminds me of the Midori travel journal a little. That's also how I realized I like the thicker leather. This journal just feel better to hold. It has beautiful deckled paper inside too.
I've been experimenting off and on in the tall journal, testing pens, inks, watercolors, and paints.
This paper holds up surprisingly well. The only bleed through was when I used a lot of water. The Distress ink pad bled completely through the page when I added water.
Overall, fun class, fun day with friends, good lunch. It all went too fast.
Tuesday, June 21, 2016
June Weeks
I was playing around with printing out some days of the week for another journal I keep, my writing journal. I'm not always at my art table when I work on this, and thought it would be convenient to have some preprinted days to put on the pages. I played with font and font size and printed some out. Since it's saved on my computer, I can print more as needed, changing font styles and paper.
Then it occurred to me that I could change the print parameters and print it in a landscape orientation (with just the seven days of the week), and it would be perfect for the planner page.
So that's what I did, for the week of June 5th. Printed it on ledger paper, added some arty stickers and it's done.
I'm happy with those two weeks. I'm getting behind on my PACs (the art cards). I usually start something once I know the theme, just to get some ideas flowing, then i put them in a plastic sleeve. I need to catch up with those. It could be that once I finish them and add them to the planner, June won't fit in this binder after all, but we'll see!
Then it occurred to me that I could change the print parameters and print it in a landscape orientation (with just the seven days of the week), and it would be perfect for the planner page.
So that's what I did, for the week of June 5th. Printed it on ledger paper, added some arty stickers and it's done.
I've recently been playing with a border stamp that I love. I can't tell you who makes it because I don't know. (It was a gift.) I just know I went crazy stamping the border on paper, card stock, tissue paper, label paper, and book paper. I put a strip in my little notebook where i doodle when I'm on the phone.
And that's how I ended up with this planner page for the week of June 12th. That border stamp looks great when you cut around the edge of the design. I'm happy with those two weeks. I'm getting behind on my PACs (the art cards). I usually start something once I know the theme, just to get some ideas flowing, then i put them in a plastic sleeve. I need to catch up with those. It could be that once I finish them and add them to the planner, June won't fit in this binder after all, but we'll see!
Subscribe to:
Posts (Atom)