Monday, May 30, 2016

Exploring May

More pages in the planner from May -- This is the back of my May monthly calendar and is for the week of May 1.  It is a file folder cut to size, and I glued down some vintage ledger paper, then drew lines across to designate the days.  I used my hand carved days of the week stamps, and some number stamps.  I like having lots of options for numbers and words, and sometimes wonder if I have too many alphabet sets and number sets.  Hahaha.....no, that's just ridiculous!
On the opposite side, for the week of May 8, I used cardstock that has a grid pattern on it.  I continue to print on label paper, but recently used a coupon to buy full sheets of label paper, so that I don't have to piece the art together if I want to use more than the small labels I had been printing on.  This particular art is from a travel journal Mary Ann Moss did a few years ago. It was available for download at one point, but is also a freebie at The Artsronauts Club

I put the label down one side and continued my lines from the previous week's page to make divisions for the days.  I made the numbers with a stencil and added the word 'explore' with another stencil.
I printed off an expense envelope and punched holes in it, adding it between the two pages.  I don't really need an envelope for expenses, and even if I did, most of my receipts wouldn't fit in that envelope anyway.  I mainly put it there to remind me that I had found the template online (here) in case I wanted one for something else in the future.

Wednesday, May 18, 2016

In a Bind(er)

The binder I'm using for my 2016 DLP planner will definitely hold the May pages.  It might hold June too, but it's getting full and that might be pretty tight.  Some people have already started using a second binder.

I bought my original kraft binder from Amazon for $5.  Even though I already have a second one, I decided at that price to order more in case I need them.  And what I get for me, I get for my friend Gaye... so, I ordered three. 

Order went through fine, it showed three binders on order, $5 each.  But what I received was this:
One the size I wanted, and two very small binders, ATC size.  I immediately emailed them to arrange return of the two small ones and to obtain two larger ones.  I received an email with return instructions and a prepaid shipping label to print out.  So far, so good.

Five minutes later, I received another email from a customer service rep telling me I didn't have to return the two items, just to keep them.  And that they would ship out the correct items.  Fantastic, I thought! I was very impressed with the way Amazon handled this.

A couple of days later, this is what I had in my possession:
At this point I was ready to just forget the whole thing.   It's obvious their items are not marked with the proper item number.  And it's probably why I only paid $5 for the first binders I ordered.  That's the price for the smaller binders.

But wait!  A couple of days later, I received another email stating that since I had not returned the original items, my credit card would be charged if they were not received within the week.  But, but, I was told not to return them by someone else!  So I reprinted the shipping label (because I threw away the first one I printed) and had to drive quite a distance to a UPS store to ship them. 

They sent one of those standard "How was your experience" emails not long after that.  I used up all of the allotted space and number of characters to tell them.  I have always had a good experience with Amazon, but this was not one of them. 

In the end, I think I may use these FREE binders that Gaye picked up for me at a recent FreeCycle event held in Louisville.  Everything is free, and these were binders that held paper samples or something.  Same size, maybe a little bigger spine.  Great price!  :)

Tuesday, May 17, 2016

Picking Paper

I continue to search in my supplies on hand to find interesting things to put in my 2016 DLP planner. I remembered I had this paper from Paper Direct. I'm not sure if they are still in business as it's been so long since I used to order from them, back in the days when interesting papers weren't readily available.  Okay, I googled them, and they are still in business!  Anyway, this wasn't even originally my paper.  I got it at Gaye's yard sale (of course) because she always gets cool stuff and if you hang around long enough, she needs to get rid of it to make way for something else.  Works for me and the rest of her friends!

This shows two different papers, and both have a different design on the front and the back.  I printed on both sides to see what I liked best and where the weekly calendar would land.  The paper in the back had perforations in it, so I didn't even try that.
I decided on this piece of paper and stamped my days and numbers.  You can see the dotted paper from the previous week.  I ended up cutting it off and leaving just a flap from the other side. 
For the May calendar, I already had decided to use a file folder cut to size.  It is solid color on one side and has a very slight pattern on the other side.  I used a piece of scrapbook paper glued to the tab and part of the page, then attached a vintage label with the month stamped on it.  I really liked the spring-like flowers on the scrapbook paper.  Then I realized that would all be covered up with my calendar, so I printed the monthly calendar template onto velum paper.  I can still see through it and enjoy the paper below.
Looks good to me... onward to the next weeks....
 

Sunday, May 1, 2016

May Day, May Day

Isn't that a distress call, "May Day"??  I'm in distress, I'm getting behind on assignments again!

April flew by at my house.  I don't know where it went.  I had a lot of extra work, I was sick, I had to wade through tax stuff.  Next thing you know, it's May!

I did play with weekly pages during that time, but I am still a little behind.
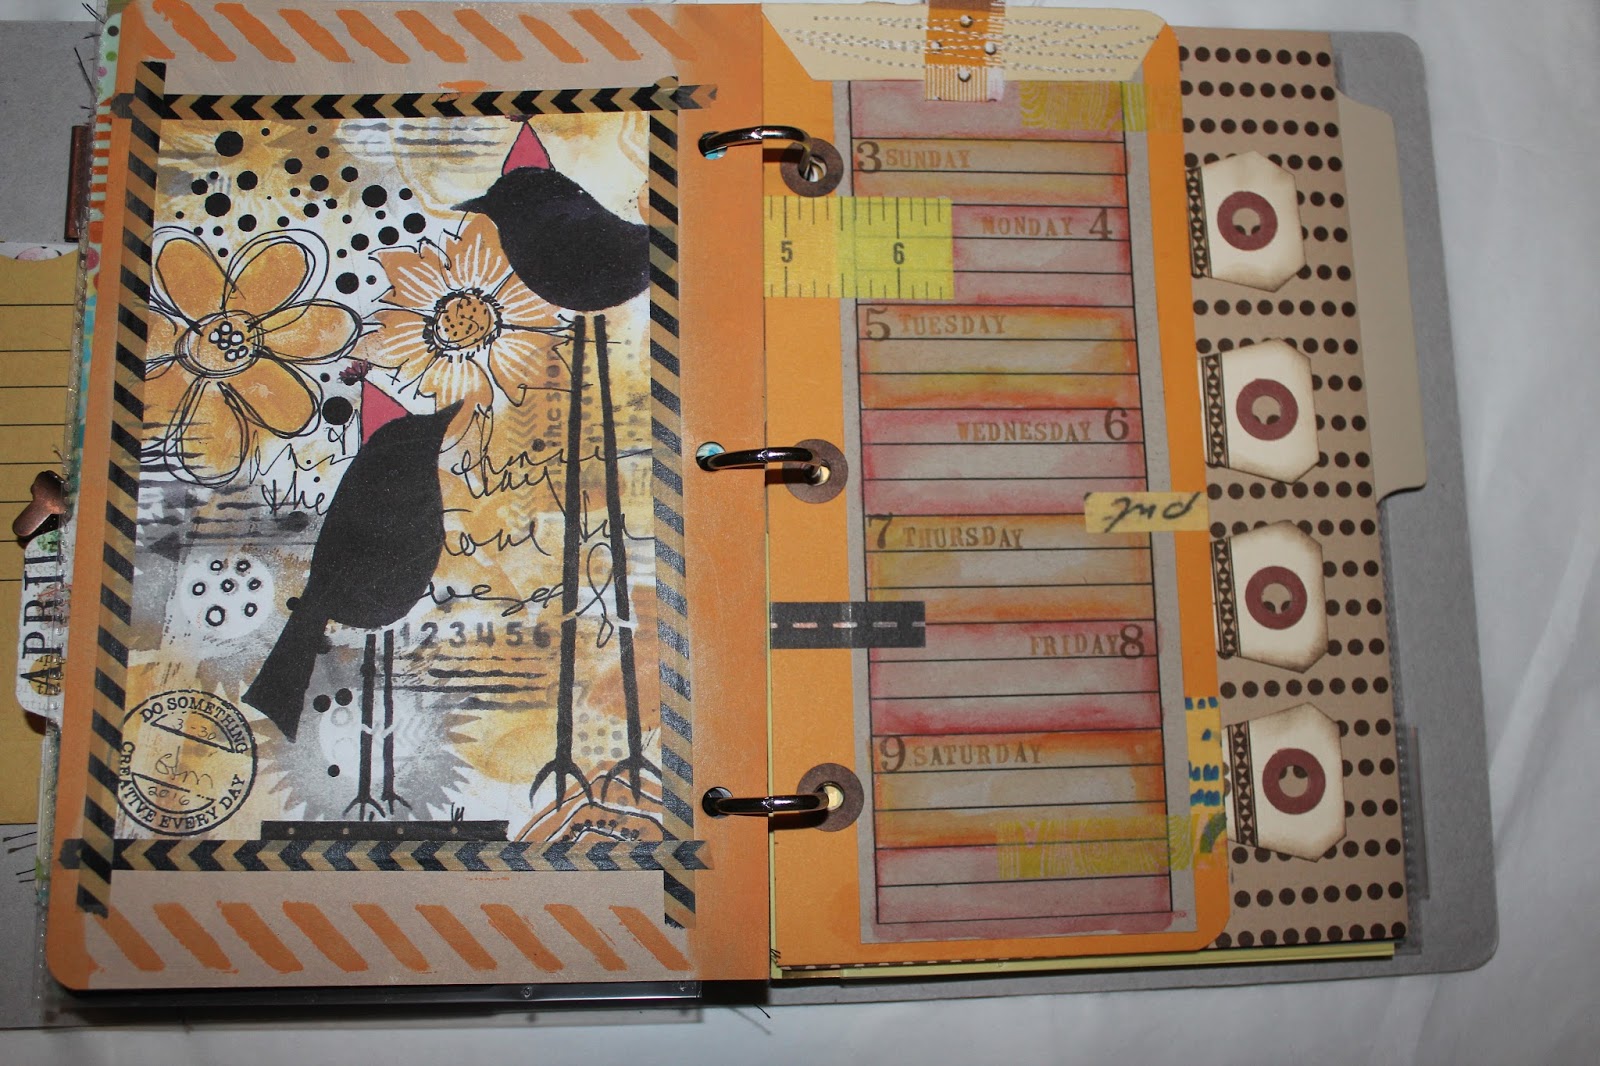
For my weekly calendar for April 3rd, I used a large tag that was orange on one side and tan on the back.  I printed out a blank list and glued it to the tag, adding tapes and stickers.  I repeated something I did a previous week and used watercolor pencil to block off the days.  Then I stamped the numbers and words.  I folded the tab over and stitched a piece of fabric to it.  
 
I picked this tag because I wanted something that matched the art on the left side, a birthday card from friend Gaye!  I made a color copy of the art and glued it to the back of the previous page, added washi tape, and used stencil and paint for more orange color.  
On the back of the orange tag, I painted and stenciled, and added vintage ledger paper with the days stamped on it for the week of April 10th.  I picked several papers that would make a good page for the week of April 17th, but it needed to compliment all the colors currently going on.  I don't try to "match" everything, just make it look pretty good together. I ended up liking the paper with dots.  I didn't want to completely cover up the dots with a weekly calendar page, so I found another way to add the days.
I cut small tags into triangle shapes, added decorative tape, then stamped the numbers and days.  It so happens I had just received some number stamps as a gift :)

I also used stamp pad ink on the edges of the pointy tags.  Really like how they turned out.
You can see the dot/tag page sticking out behind the big orange tag. 
I realized that most of my weekly pages just have days and numbers on them.  There is nothing to say what month it is.  I stamped "April" onto a scrap of card and will put it at the top.  I have it paper-clipped for now because I'm not sure how the back side of that page will end up.  The dot paper is folded, so it may end up with dots too.  Or I may cut that off and do something totally different.  I may do some sewing on the dot/tag page.
The tags are actually only partially attached and I debated sewing around each one.  But I realized I can use the loose pointed ends to hold things.  However, if those "things" start falling out, that idea will be tossed aside! 
I will work on the week of April 24th next, then May 1st.  However, the new theme for May won't be published until next Saturday, May 7th, so I may wait until then to do the first week in May.